Your backyard is sitting out there right now doing nothing, and summer is already here. You do not need a landscape architect. You do not need a contractor or a permit or a budget that makes you nervous to look at. What you need is a handful of practical ideas and a free weekend afternoon.
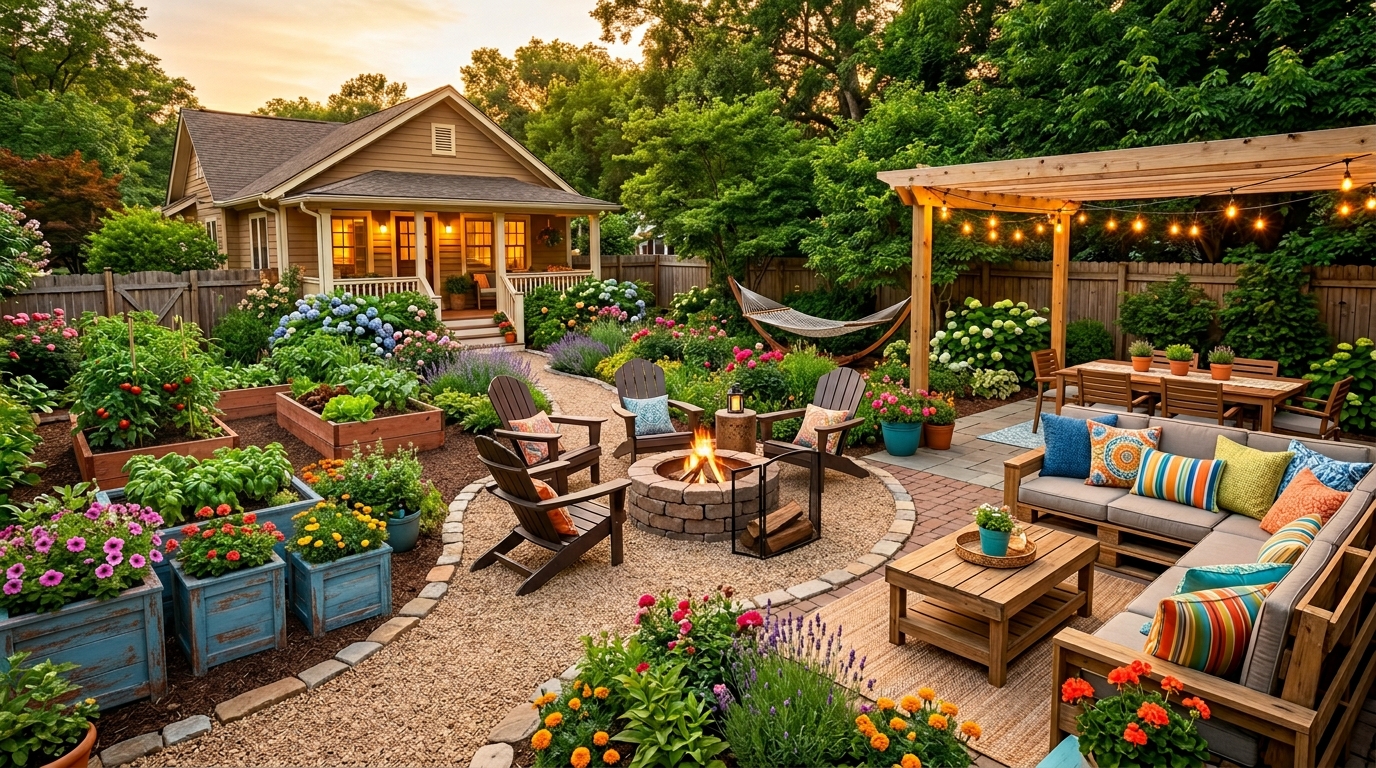
These DIY backyard ideas on a budget focus on exactly what the title says: real projects you can build, plant, hang, or assemble yourself without spending a lot of money. Fire pit seating, string lights, raised garden beds, outdoor dining setups, water features, pathways. Each idea is its own weekend project that makes the yard more usable, more comfortable, and more worth spending time in.
You will find 20 ideas here. Some cost under 20 dollars. Some take a single afternoon. None of them require professional help or tools you do not already own. Pick one and go outside.
Build a Simple Cinder Block Fire Pit
A fire pit does not need to be expensive or complicated. A ring of standard cinder blocks from Home Depot arranged in a circle on level ground gives you a working fire pit in about an hour. No mortar required. No digging required. Just level the ground, lay the first ring, stack a second ring offset from the first, and you are done.
Use 8 by 8 by 16 inch cinder blocks, which run about 1.50 to 2 dollars each. A fire pit that seats four to six people comfortably needs roughly 24 to 30 blocks total. The finished pit costs under 50 dollars and holds up to heat, rain, and years of regular use. Add a metal grate on top and it functions as a grill as well.
Keep the pit at least 10 feet from the house, the fence, and any overhead branches. That is the one rule that matters.
Hang String Lights Between Two Posts
String lights are one of the fastest ways to change how a backyard feels after dark. Strung overhead between two wooden posts, they create an outdoor room where before there was just an open yard. The whole thing takes less than a Saturday morning to set up and costs very little.
Sink two 4 by 4 cedar posts into the ground about 10 to 12 feet apart using quick-set concrete from a hardware store. Let them cure, then string Edison-style outdoor lights from post to post in a single line or a zigzag pattern depending on the space. The Brightech Ambience Pro outdoor string lights and the Lemontec Commercial Grade String Lights both handle rain, heat, and wind reliably and are worth the slightly higher price over bargain options that burn out after one season.
Use a smart plug so the lights come on automatically at dusk. You will use the backyard more in the evenings than you ever did before.
DIY Backyard Ideas on a Budget Always Include a Raised Garden Bed
A raised garden bed does three things at once: it gives you a place to grow vegetables or herbs, it adds structure to the yard, and it makes gardening dramatically easier on your back. And you can build one for under 30 dollars in materials.
Use two 8 foot lengths of 2 by 10 untreated cedar lumber cut into four pieces: two at 8 feet and two at 4 feet. Screw the corners together with 3 inch deck screws, set the frame in place, fill it with a mix of topsoil and compost, and plant the same day. Cedar naturally resists rot without any chemical treatment, so it is safe for food growing and will last 10 to 15 years outdoors.
Start with one bed for tomatoes, peppers, zucchini, or whatever your household actually eats. A single 4 by 8 bed produces far more than most people expect.
Lay a Gravel Pathway Between Garden Beds or Seating Areas
Grass between garden beds turns into mud after every rain. A gravel pathway solves that permanently and adds a clean, intentional look to the yard at very low cost. A 10 foot pathway that is 2 feet wide uses about 200 pounds of pea gravel, which typically costs under 15 dollars in a bulk bag.
Dig out the grass along the path line to a depth of about 2 inches. Lay landscape fabric cut to fit, staple it flat, then pour and rake the gravel evenly on top. The fabric blocks weeds from pushing through while still letting water drain freely. Border the edges with inexpensive plastic landscape edging to keep the gravel contained.
Pea gravel in a natural tan or buff color looks the most polished and blends well with any yard style.
Make a Pallet Wood Outdoor Sofa
Outdoor furniture costs a lot. Pallet wood costs almost nothing. Two wooden shipping pallets stacked on top of each other form a sofa base that is the right seat height, structurally solid, and easy to put together. Add an outdoor cushion on top and the result looks intentional and comfortable.
Source free pallets from local hardware stores, nurseries, garden centers, or the Facebook Marketplace free section. Look for heat-treated pallets stamped HT, which are safe to repurpose. Sand the surface smooth with 80-grit sandpaper, then 120-grit for a finer finish. Paint or stain with an exterior-grade product in a color that works with your yard. Behr Marquee Exterior Paint in a deep charcoal or warm greige holds up particularly well outdoors.
Add four furniture legs from a hardware store to raise the base slightly off the ground, which improves drainage and extends the life of the wood.
Build a Low Budget Outdoor Dining Table from 2x4s
An outdoor dining table made from 2 by 4 lumber costs about 40 to 60 dollars in materials and holds up better than most mid-range patio furniture because the wood is solid and thick. The build requires only a circular saw, a drill, and basic deck screws.
Ana White’s website has a free outdoor farmhouse table plan that uses standard lumber dimensions and requires no advanced woodworking skills. The finished table seats six people comfortably and can be built in a single afternoon once the materials are cut. Sand the surface smooth and finish with an exterior deck stain or a coat of outdoor polyurethane to protect it from moisture.
Pair it with mismatched folding chairs painted the same color for a finished, cohesive look without spending money on a matching chair set.
Add a DIY Outdoor Rug with Deck Paint
What is an outdoor rug without the price tag? A concrete or wood deck painted with a geometric pattern using stencils and porch and patio paint. The result looks exactly like a woven outdoor rug and costs under 20 dollars total.
Clean the deck or patio surface thoroughly and let it dry completely. Tape a stencil from Craft Chameleon or Royal Design Studio in the center of the space and apply porch paint with a foam roller in one or two coats, letting each layer dry before moving the stencil. Seal the finished design with clear exterior polyurethane for durability through rain and foot traffic.
Choose a pattern and color combination that works with your furniture. Navy and white, terracotta and cream, and sage and off-white all photograph beautifully and hold up through a full summer season.
Install a Simple Rain Barrel for Free Garden Watering
A rain barrel collects water from your downspout and stores it for garden and lawn use. A 50-gallon barrel attached to a single downspout fills in less than an inch of rainfall and can supply most of your outdoor watering needs throughout the summer, which lowers your water bill noticeably over time.
Food-grade plastic barrels are available used from local breweries, car washes, or food manufacturers for under 20 dollars. Cut a hole in the lid sized to fit a standard downspout diverter, attach a spigot near the bottom using a drill and a bulkhead fitting, and prop the barrel on cinder blocks to create enough gravity pressure to fill a watering can from the spigot.
Screen the lid opening to keep mosquitoes out. This is the one step most people skip and the one step that matters most.
DIY Backyard Ideas on a Budget Include a Painted Concrete Pot
Terra cotta and concrete pots are inexpensive to buy and expensive to replace. Painting them with exterior spray paint or concrete-specific chalk paint extends their life and turns them into intentional decor. A cluster of three pots in varying heights, painted the same color in a matte finish, looks like something from a high-end garden shop.
Use Rust-Oleum 2X Coverage Matte spray paint in a single neutral like warm white, dusty sage, or matte black. Prime the pot surface first if it is uncoated terra cotta. Two light coats with 20 minutes drying between each give the most even coverage. Fill the pots with trailing plants like sweet potato vine, creeping Jenny, or calibrachoa for a full, lush look through the whole summer.
Group odd numbers. Three pots always reads better than two or four.
Build a Firewood Storage Rack from Lumber Scraps
Firewood piled on the ground rots, collects pests, and looks like an afterthought. A simple elevated rack made from scrap 2 by 4 lumber or leftover deck boards keeps the wood dry, ventilated, and stacked neatly against a fence or wall.
Cut four vertical posts at 36 inches and two horizontal rails at 48 inches. Screw the rails between the posts at the top and bottom to form a rectangular frame, then attach two short feet at the base to keep the whole structure lifted off the ground. The finished rack costs almost nothing if you have scrap lumber, and under 15 dollars if you need to buy the wood new.
Stain the rack to match your fence and it looks like it was designed to be there.
Set Up a Budget Outdoor Movie Screen
A white bedsheet stretched tightly between two trees or posts creates a perfectly functional outdoor movie screen. Add a cheap outdoor projector, a bluetooth speaker, and some chairs or blankets and you have a summer evening setup that your household will use all season.
Use a flat white or off-white sheet with no pattern. The smoother the fabric, the sharper the image. Stretch it tight using bungee cords or rope tied through the corner hem loops. The Kodak Luma 350 and the Anker Nebula Capsule II are both compact outdoor projectors under 200 dollars that produce a bright, clear image even at moderate ambient light levels.
Set up facing away from streetlights or neighboring lights for the best picture.
Plant a Three-Sisters Garden in a Corner of the Yard
The three-sisters planting method is one of the most productive and cost-effective ways to use a small patch of backyard soil. Corn, beans, and squash are planted together in the same space. The corn grows tall and provides a climbing structure for the beans. The beans fix nitrogen in the soil that feeds the corn and squash. The squash spreads along the ground, shading out weeds and retaining moisture.
Start with a 4 by 4 foot mound of amended soil. Plant corn seeds in the center in a small cluster, not a single row. Once the corn reaches 6 inches, plant pole beans around the corn stems. Once the beans sprout, plant squash seeds at the outer edge of the mound. The whole setup cost is the price of three seed packets.
This method was used by Native American farmers for thousands of years and it produces genuinely impressive harvests in a small space.
Build a Backyard Pergola Frame with 4×4 Posts and a Top Rail
A full pergola does not have to be a major construction project. A simple four-post frame with a top rail and cross beams defines an outdoor space, supports climbing plants, and creates the feeling of an outdoor room without walls. Built from pressure-treated lumber, the materials cost around 150 to 200 dollars for a 10 by 10 foot structure.
Set four 4 by 4 by 10 foot posts in quick-set concrete at the corners. Connect the tops with 2 by 8 beams and lay 2 by 4 rafters across the top spaced about 16 inches apart. The whole structure goes up in a day with two people and basic tools. Train jasmine, wisteria, climbing roses, or a grape vine up the posts and the pergola fills in naturally over the first season.
Do not overthink the finish. Let it weather naturally or apply one coat of exterior stain.
Make a Solar-Lit Garden Border with Mason Jars
Mason jars fitted with solar-powered LED lids make inexpensive, weather-resistant pathway lights that charge during the day and glow at night. A set of 12 solar mason jar lids costs around 15 to 20 dollars online, and standard wide-mouth mason jars run about 10 dollars for a dozen.
Press the jars into the soil along the edge of a garden bed or pathway so they sit at ground level, or set them on flat stones or fence posts for more visibility. The warm amber glow they produce at night is gentle and atmospheric rather than harsh. Replace the batteries in the lids once a season to keep the output bright.
Fill the jars with a tablespoon of sand at the bottom to add weight and stability so wind does not knock them over.
Hang a DIY Macrame Hammock Between Two Trees
A store-bought outdoor hammock costs 60 to 150 dollars. A DIY version made from cotton rope or nylon cord costs about 20 dollars in materials and takes one afternoon to complete. No special equipment is needed beyond the rope itself and two large eye bolts with straps rated for outdoor use.
Use 3-strand twisted natural cotton rope at 5mm thickness for a hammock that has the look of traditional macrame but the strength to hold an adult comfortably. Free hammock patterns are available on Macrame School on YouTube. The finished dimensions for a hammock that fits one adult comfortably are roughly 4 feet wide and 7 feet long before the hanging cords.
Hang it with hammock straps rather than rope directly on the trees to protect the bark.
Create a Budget Herb Spiral from Stacked Stones
An herb spiral is a raised planting structure built in a spiral shape so different herbs sit at different heights and drainage levels. Herbs that prefer dry conditions like rosemary, thyme, and oregano go at the top. Herbs that prefer more moisture like basil, cilantro, and parsley go at the base. The whole structure fits in a 5 by 5 foot circle and requires nothing but stacked flat stones and good soil.
Collect flat fieldstones from a local landscaping supply store or gather them from a creek bed if one is accessible. Stack them in a spiral starting from the outer edge and moving upward toward the center. Fill the inside with a mix of topsoil and sharp sand for good drainage. The finished spiral is functional on day one and looks established and intentional from the start.
This is one of the few backyard structures that is both practical and genuinely beautiful without trying.
Build a Sand Box from Landscape Timbers
A backyard sandbox made from landscape timbers is a one-afternoon project that costs under 40 dollars and gives young children a dedicated outdoor play space that keeps yard toys and digging out of the garden beds. Landscape timbers are pressure-treated, inexpensive, and sized perfectly for a simple square frame.
Use four 8-foot landscape timbers to build a square frame. Drill and connect the corners with 6-inch galvanized timber screws. Line the inside of the frame with landscape fabric to prevent weeds from pushing up through the sand. Fill with washed play sand, which is available at hardware stores in 50-pound bags for about 5 dollars each. A 4 by 4 foot sandbox at 6 inches deep needs about 400 pounds of sand.
Add a simple plywood lid cut to fit the frame to keep cats and rain out when the sandbox is not in use.
Set Up a Drip Irrigation Line for Garden Beds
Hand watering a garden every day becomes tedious fast and inconsistent watering stresses plants. A basic drip irrigation kit from a brand like Rain Bird or Orbit costs about 30 to 50 dollars and connects directly to an outdoor hose bib. The line runs along the soil surface and delivers water slowly and directly to the root zone of each plant.
Install the main supply line along the length of the bed and insert emitter stakes every 6 to 8 inches, pointed toward the base of each plant. Connect the supply line to a mechanical hose timer so the system runs automatically every morning for 20 to 30 minutes. Drip irrigation cuts water use by about 30 percent compared to overhead watering and dramatically reduces fungal issues on plants like tomatoes and squash.
Set it up once at the start of summer and do not think about it again until fall.
Build a Cheap Outdoor Bar Cart from a Folding Table
A folding utility table from Costco or Sam’s Club costs about 25 dollars, folds flat for storage, and becomes a fully functional outdoor bar cart with a few additions. Add a tablecloth or an outdoor adhesive contact paper in a bold print, a row of glass jars for bar tools and napkins, a small ice bucket, and a tiered fruit stand for glasses.
The whole setup assembles in about 10 minutes on a Friday evening and folds back into the garage when the weekend is over. For a more permanent version, paint the tabletop with outdoor chalk paint and apply a clear polyurethane topcoat for water resistance.
Keep it next to the fire pit seating area and it becomes the most used spot in the yard.
Plant a Native Wildflower Meadow in a Bare Corner
A bare corner of the backyard that grows nothing but weeds is one of the easiest spots to transform on a small budget. A native wildflower seed mix costs about 10 to 15 dollars for enough seed to cover 100 square feet and requires almost no maintenance once established.
Clear the area by smothering existing weeds with cardboard for two to three weeks before planting. Remove the cardboard, scratch the soil surface lightly with a rake, scatter the seeds by hand, and water daily for the first two weeks. After that, the plants take care of themselves. Native wildflower mixes from American Meadows or Everwilde Farms include regionally appropriate species that attract pollinators, require no fertilizer, and return every year from self-seeding.
By midsummer the corner will be full of color and movement. By late summer it will be covered in birds.
Final Thoughts
A backyard does not need a renovation to become a place worth spending time. It needs a few projects done with some intention and a willingness to do the work yourself. The best part about working with a limited budget is that it forces you to focus on what the space actually needs rather than filling it with things that look good in a store.
Pick one project this week. Build the fire pit or hang the string lights or plant the raised bed. One finished project leads to the next one naturally, and by the end of summer you will have a yard that looks and feels completely different from how it started.
These DIY backyard ideas on a budget are the starting point. What you do with them is entirely your own.